From an empty sheet to a released cutlist
How Wiring Studio models a harness, what it derives from that model, and how each view feeds the bill of materials and the cutlist.
Chapters
Last updated 3 September 2026
BOM and cut list
The BOM and the cut list are outputs, not tables you edit. Both are computed from the sheet you are on — the parts you placed, the cavities you assigned, the lengths you set — and both recompute as you work. Neither can drift from the drawing, which is the main reason they exist.
The bill of materials
The BOM aggregates every part the active sheet uses: connectors, contacts, wires, seals, coverings, heat shrink markers, labels and every extra part attached to a component, a cable or a shielded cable assembly.
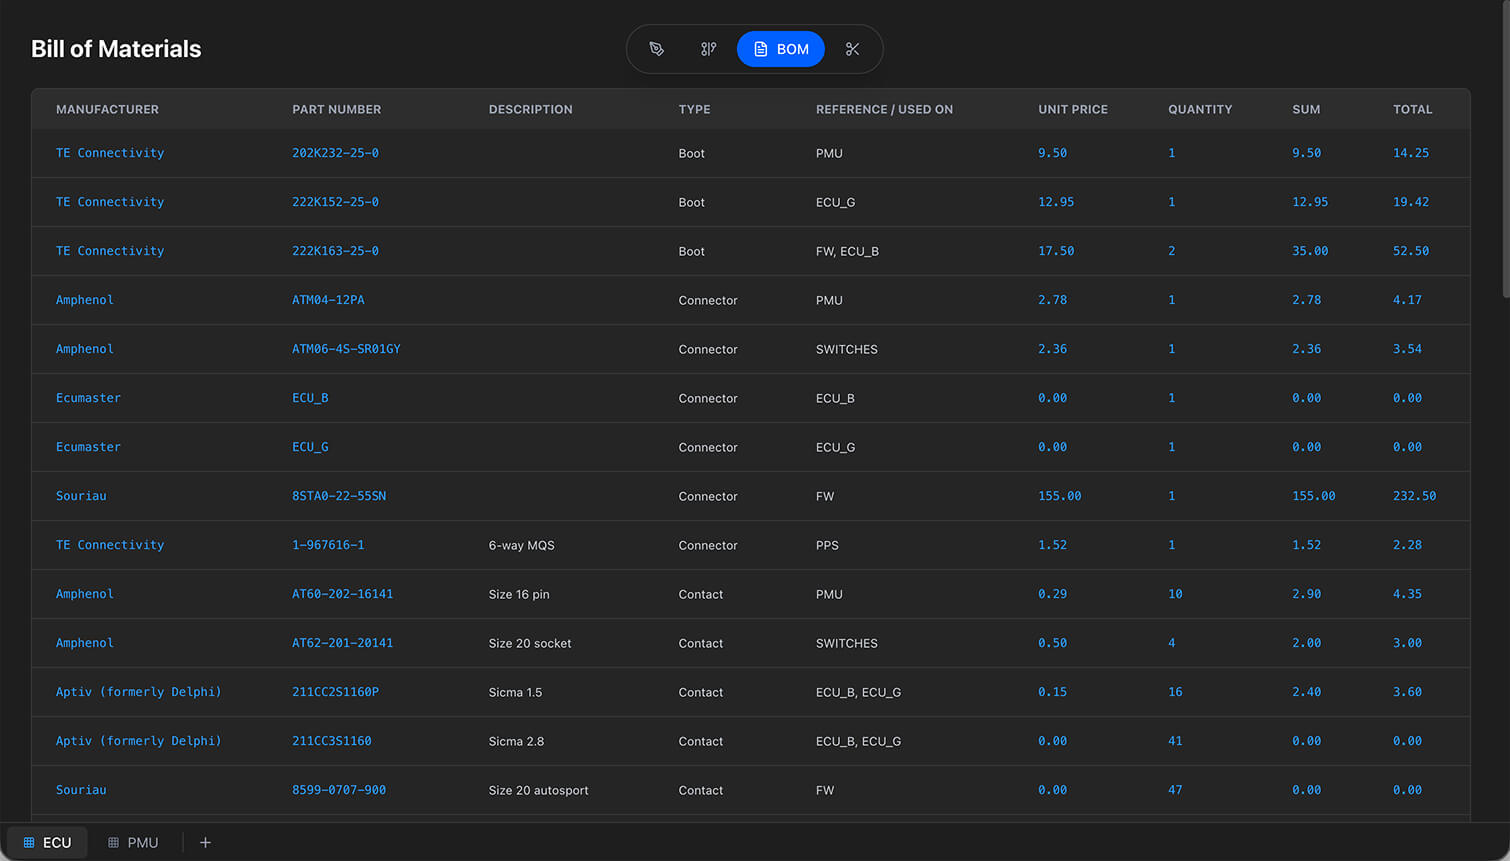
| Column | What it holds |
|---|---|
| Manufacturer | From the parts library. |
| Part Number | The manufacturer's part number. |
| Description | The part's description. |
| Type | The category — Connector, Wire, Contact, Heat Shrink. |
| Reference / Used On | Which components use it. |
| Unit Price | Price per piece, or per metre or foot for length-priced parts. |
| Quantity | A count, or a total length with its unit. |
| Sum | Unit price times quantity. |
| Total | Sum times the project's price multiplier. |

The BOM covers the active sheet, not the whole project. Switch sheets to see another one's, or include several sheets in a PDF export to get them all in one document.
How the BOM is calculated
Quantities
- Counted parts — connectors, contacts, seals, locks and the rest: how many times the part is used.
- Length-priced parts — wires, coverings, heat shrink and labels: the total of the assigned lengths.
Pricing
Sum is unit price times quantity. Total is that Sum times the price multiplier from Project settings, which defaults to 1.05 — five per cent — and is there for markup or overhead. Set it to 1.0 for raw material cost.
Wires are the one exception to the plain arithmetic: the cutlist multiplier is applied to a wire's length before the BOM counts it, so the BOM orders the material you will actually cut rather than the length drawn.
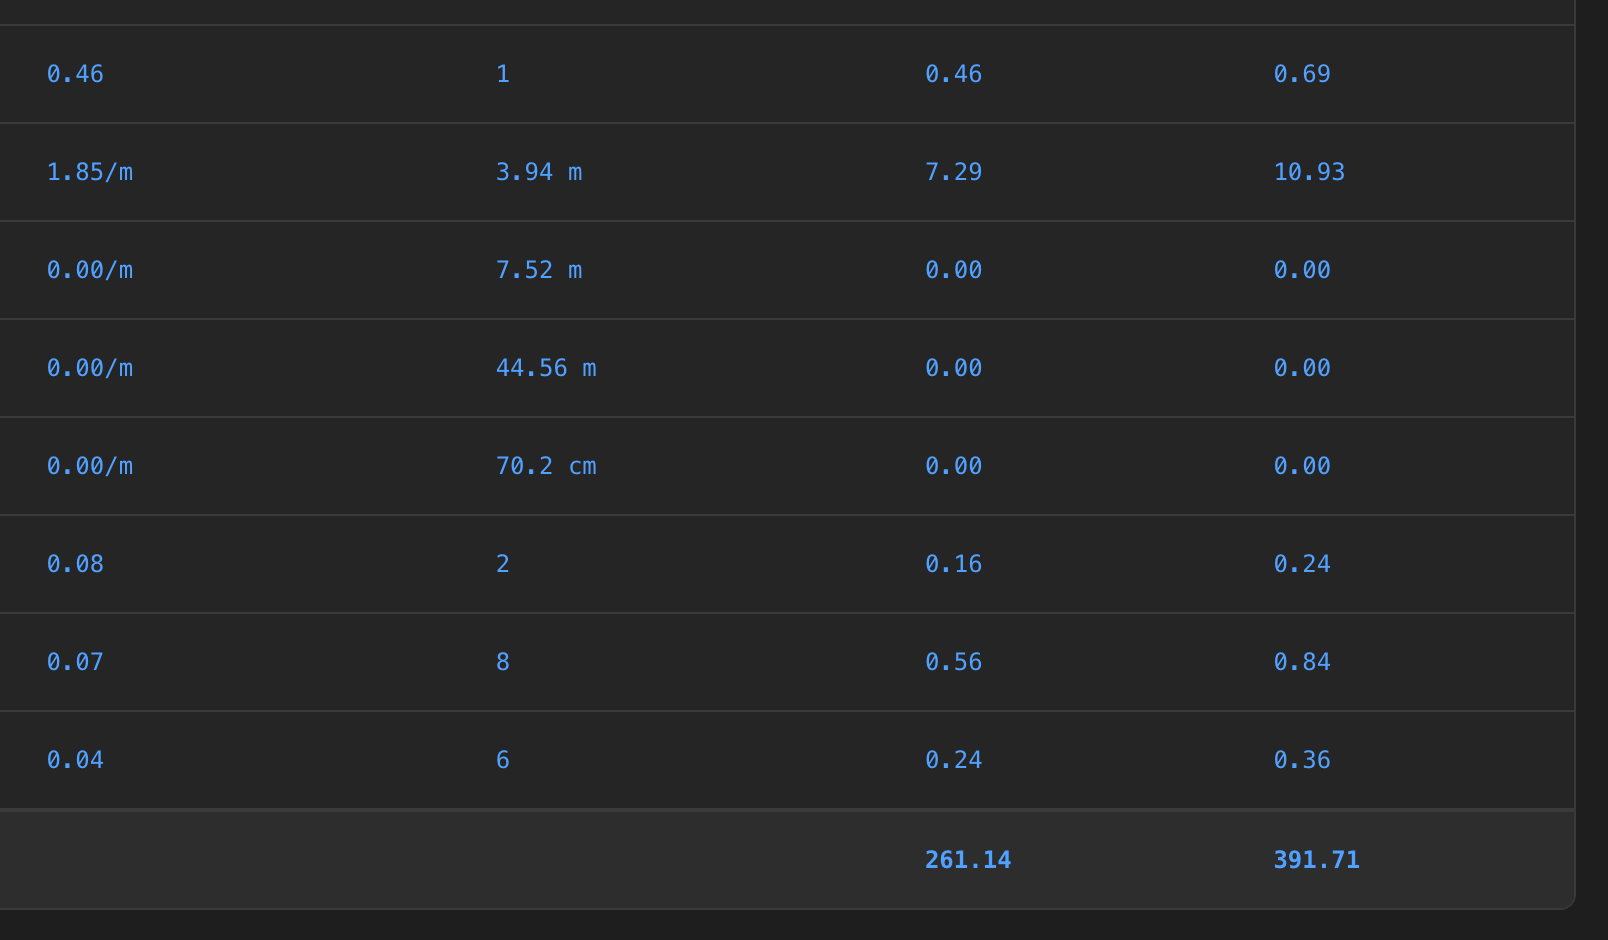
Units and rounding
- Metric converts by magnitude: millimetres below a centimetre, centimetres normally, metres above a metre.
- Imperial shows fractional inches — 3 1/4, 7/8, 12 3/8.
- Values are rounded to two decimal places.
The row at the foot of the table totals the Sum and Total columns for the sheet.
The cut list
The Cutlist lists every wire connection with the length to cut it at, which is what the bench actually works from.
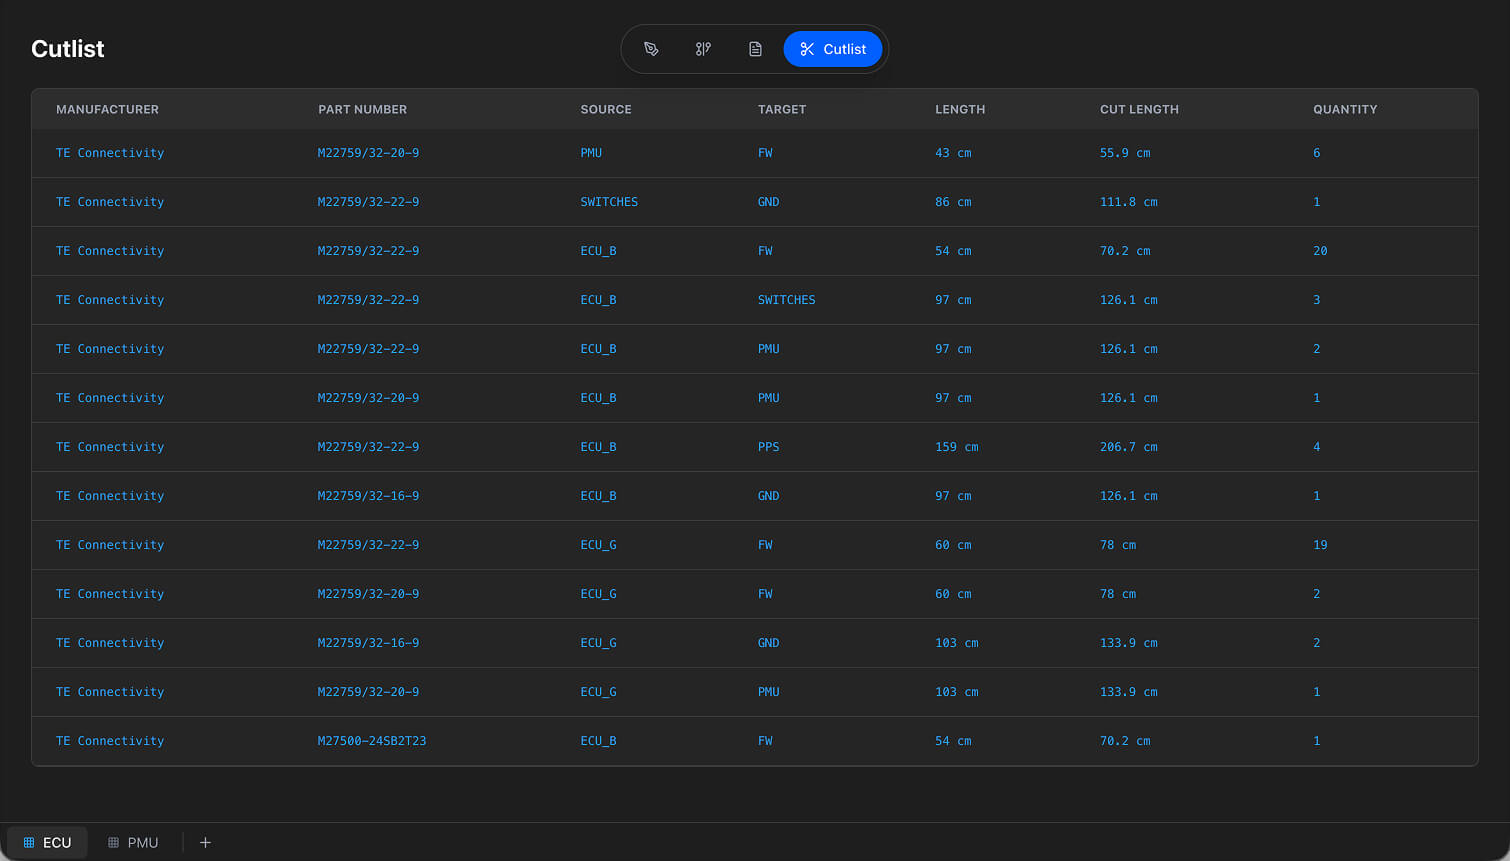
| Column | What it holds |
|---|---|
| Manufacturer | The wire's manufacturer. |
| Part Number | The wire part number. |
| Source | The component at one end. |
| Target | The component at the other. |
| Length | The base length from the design. |
| Cut Length | Length times the cutlist multiplier. |
| Quantity | How many identical connections there are. |
Only connections with a wire part assigned appear. If Pin Configuration has no wires in it, the cut list is empty.
Where the lengths come from
A wire's base length is the length set on the cable it runs through, in the Design view. Where a cable has no length set, the straight-line distance between the two components is used instead — which is a placeholder, not a measurement, and is exactly what the design rule checks report as a missing cable length.
The cutlist multiplier then adds the margin: cut length is base length times the multiplier. It defaults to 1.05, covering termination length, routing slack and stripping waste.
Set the multiplier to 1.0 if you want exact drawn lengths, or higher on long harnesses where slack accumulates. It is a project-wide setting, so decide it before releasing a cut list to production.
Lengths are stored in centimetres and inches at the same time, so switching the project's units changes only how they are displayed.
Shielded cables and fillers
A shielded cable's strands are listed individually — one row each, with its own source, target and cut length. Shield connections are tracked separately from the conductors. See Cable shielding.
Filler wires added in the cable layer editor appear in both tables, with their lengths taken from the cable run, so a concentrically laid cable is costed for what it actually contains.
Fixing a part from the BOM
Part numbers in the BOM are clickable. Clicking one opens that part in the library editor, so you can correct a price or a description without leaving the table. The change applies everywhere the part is used, and the BOM recomputes.
If a part shows no price, it contributes nothing to the total rather than failing. The Costing design rules exist to catch exactly that before you quote from the number at the bottom of the table.
Getting them out
Both tables can be included in a PDF export, and the export dialog lets you turn individual columns off. That is how you produce a BOM without pricing for a customer, or a cut list carrying only source, target and cut length for the shop floor.
Related chapters
Where this chapter leads next, and what it assumes you have already read.
Pin configuration
Where the harness is wired — the wire, contact, seal and colour codes on each connector cavity.
Project settings
Four settings with a long reach — units, the cutlist and price multipliers, and marker length.
PDF export
One PDF across any combination of the five views and the sheets you choose, with per-table column toggles.