From an empty sheet to a released cutlist
How Wiring Studio models a harness, what it derives from that model, and how each view feeds the bill of materials and the cutlist.
Chapters
Last updated 3 September 2026
Parts and the library
The parts library is your inventory of connectors, wires, contacts, seals and everything else a harness is built from. Every part you place on a canvas or assign to a cavity comes from here, and the manufacturer data, pricing and category properties you enter are what the BOM and cut list report.
Opening the library
Open Library from the Projects page toolbar, or from inside a project. The library belongs to the workspace you are in — your personal library, or the shared library of an organisation. See Collaboration.
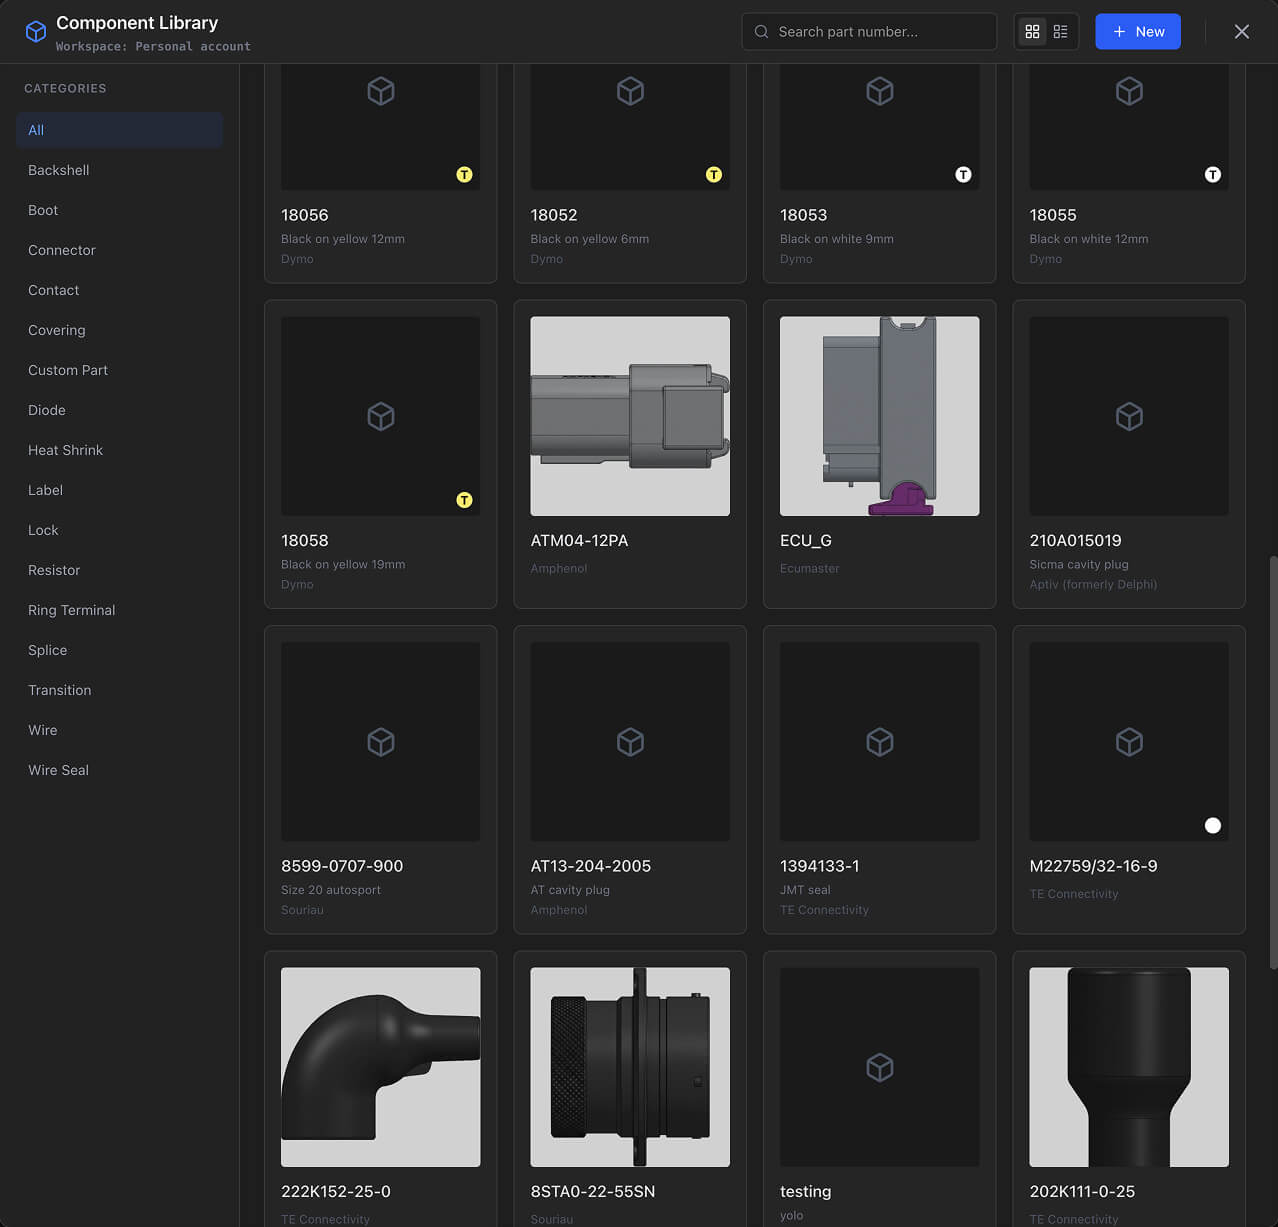
- Category tabs filter to one type of part.
- Search filters by part number, manufacturer or description.
- Grid and table views switch between cards and a compact list.
An organisation's library is shared. A part added by any member is available to everyone, and editing one changes it for every project that uses it.
Categories
There are 16 categories. Which fields a part has depends on its category.
Placed on a canvas
- Connector — the main electrical connector. Carries a cavity count, cavity labels and a label type.
- Ring Terminal — a ring-style crimp terminal for a bolt-on connection, with a gauge range.
- Transition — a branch point, where a cable splits.
- Splice — where conductors are joined. Attaches to a parent component and carries a gauge range.
- Diode — anode and cathode. Attaches to a parent component.
- Resistor — two pins. Attaches to a parent component.
- Custom Part — anything the other categories do not cover.
Wire and cable
- Wire — gauge, unit (AWG or mm²), colour, stripes, and whether it is a shielded multicore with a strand count. Priced by length.
- Covering — convoluted tubing, braided sleeving and the like. Priced by length.
- Heat Shrink — the coloured markers used for wire identification. Priced by length. See Wire colours and marking.
- Label — cable labels, with a background and a foreground colour. Priced by length.
Terminals and sealing
- Contact — terminal pins and sockets, with a minimum and maximum gauge used to check the wire assigned alongside them.
- Wire Seal / Cavity Plug — seals for wired cavities and plugs for empty ones.
Accessories
- Backshell, Boot and Lock — added to a component as extra parts and counted in the BOM.
Common fields
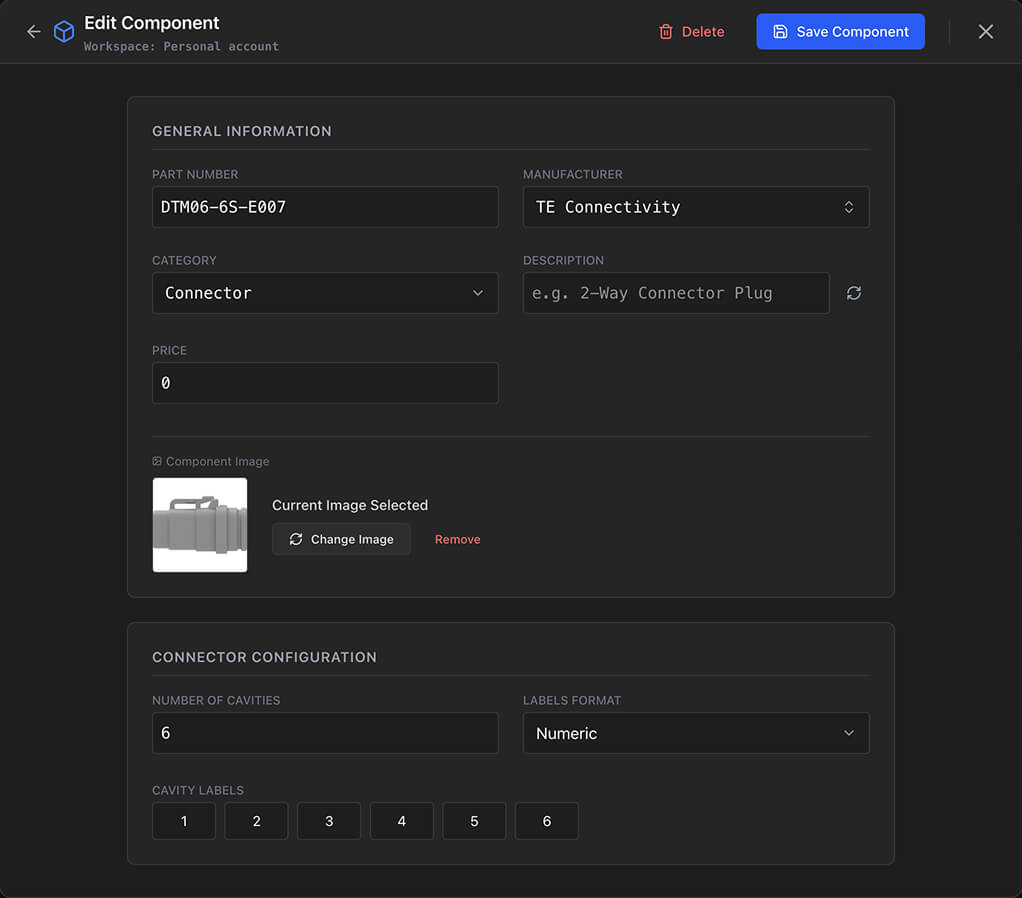
| Field | Notes |
|---|---|
| Manufacturer | Autocompletes from the manufacturers already in your library, so the same name is not stored three ways. |
| Part Number | The manufacturer's part number. |
| Description | A short description. Can be generated for you — see below. |
| Price | Per piece, or per metre or foot for the length-priced categories. |
| Image | Optional, on connectors, ring terminals, transitions, custom parts, backshells and boots. Drawn on the canvas. |
| Contact arrangement | Connectors only. The cavity layout drawing, shown beside the pin configuration table. |
Category properties
Connector
- Cavities — how many, for example 12, 24 or 48.
- Label Type — alphabetic (A, B, C…), numeric (1, 2, 3…) or custom.
- Cavity Labels — the custom labels, when the type is custom.
Wire
- Gauge and Unit — a number plus AWG or mm².
- Colour and Stripes — the insulation colour and any stripe colours.
- Shielded and Strands — marks it as a multicore and says how many inner conductors it has, which is what makes it usable in Cable shielding.
- Strand colours — a colour and stripe per inner conductor.
Contact, splice and ring terminal
A gauge range — minimum and maximum, in AWG or mm². When you assign a contact next to a wire in pin configuration, the wire's gauge is checked against it, and a mismatch is reported by the design rule checks.
Heat shrink, covering and label
Heat shrink and covering carry a colour; a label carries a background and a foreground colour. All three are priced by length.
Part images
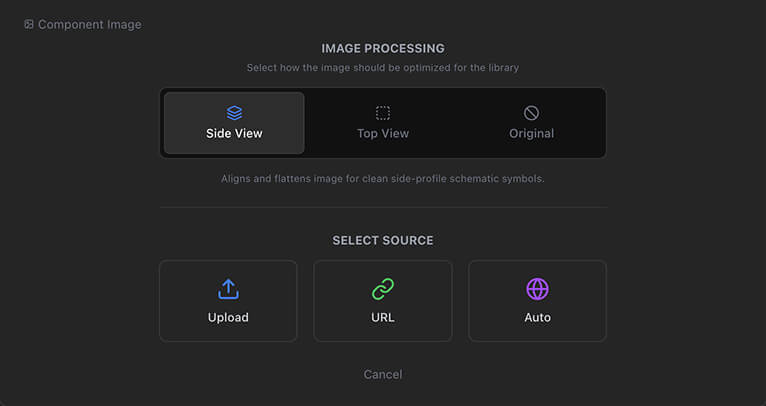
Where a part can have an image, there are four ways to give it one, chosen under Select Source.
| Source | What it does |
|---|---|
| Upload | Pick an image file from this machine. |
| URL | Paste the address of an image on the web. |
| Mobile | Shows a QR code; scan it to photograph the part with your phone and send it straight into the field. Web only. |
| Auto | Searches the web for the part using the manufacturer and part number you have entered. |
Processing
Whichever source you use, you can have the image cleaned up before it is saved:
- Side View — aligns and flattens the image into a clean side profile. Best for the schematic.
- Top View — corrects the perspective for a top-down view. Best for formboard layout.
- Original — keeps the image exactly as supplied.
The Auto search and both processing modes are AI features, so they need a Lite, Pro or Team plan and a connection. Upload works on every plan, and works offline in the desktop app — the image is uploaded when you reconnect.
Generated descriptions
With the manufacturer and part number filled in, the button beside Description writes a short technical description from the part's identity. It is useful when entering a run of parts from one catalogue.
Description generation is an AI feature and needs a Lite, Pro or Team plan.
Adding and editing parts
Click any part to edit it. Changes reach every component and pin assignment that uses it, and the BOM and cut list update with them.
Populate the library with the connectors, wires and contacts you use most before starting a project. Every later step — placing components, assigning cavities, pricing the BOM — is faster once they are there.
Related chapters
Where this chapter leads next, and what it assumes you have already read.
Reusable components
Save a sub-assembly or a whole sheet, wiring and pin configuration intact, and drop it into any project.
Cable shielding
Multicore shielded cables: mapping strands to cavities, terminating the shield, and the layer editor.
BOM and cut list
Two outputs derived from the sheet: how quantities, pricing, multipliers and cut lengths are worked out.