From an empty sheet to a released cutlist
How Wiring Studio models a harness, what it derives from that model, and how each view feeds the bill of materials and the cutlist.
Chapters
Last updated 3 September 2026
Project settings
Project properties is a short dialog with a long reach: four settings that decide how lengths are shown, how much wire is cut, what the BOM costs and how much heat shrink a marker uses. Set them before releasing anything to production.
Opening it
Open Project Properties from the actions panel, from the canvas context menu, or with Cmd/Ctrl + I in the desktop app.
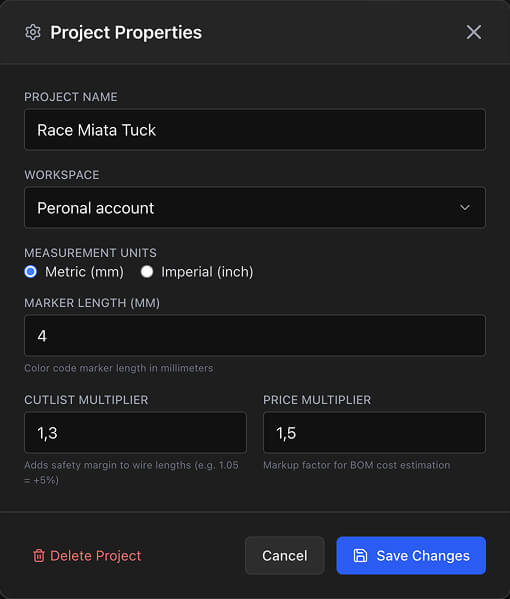
Everything here is per project. Two projects in the same workspace can use different units and different margins.
Measurement units
Metric or Imperial. It decides how every length in the app is displayed and entered:
- Metric — millimetres, centimetres or metres, chosen by magnitude.
- Imperial — fractional inches, such as 3 1/4 or 7/8.
Switching units never loses precision. Every length is stored in centimetres and inches at the same time, so this setting changes the display and nothing else.
Cutlist multiplier
The safety margin added to every wire length. Cut length is the base length times this number, and it defaults to 1.05 — five per cent.
It covers termination length, routing slack and stripping waste. It also feeds the BOM: wire quantities are computed from the cut length, not the drawn length, so the BOM orders what you will actually consume.
| Value | Effect |
|---|---|
| 1.0 | Exact drawn lengths, no margin. |
| 1.05 | Five per cent — the default, and a reasonable starting point. |
| 1.10 and above | For long harnesses where routing slack accumulates, or a process with generous strip lengths. |
Changing this changes every cut length in the project at once. Set it before a cut list goes to the bench, not after.
Price multiplier
The markup factor applied to the BOM's Total column. Sum is the raw unit price times quantity; Total is that Sum times this multiplier. It defaults to 1.05.
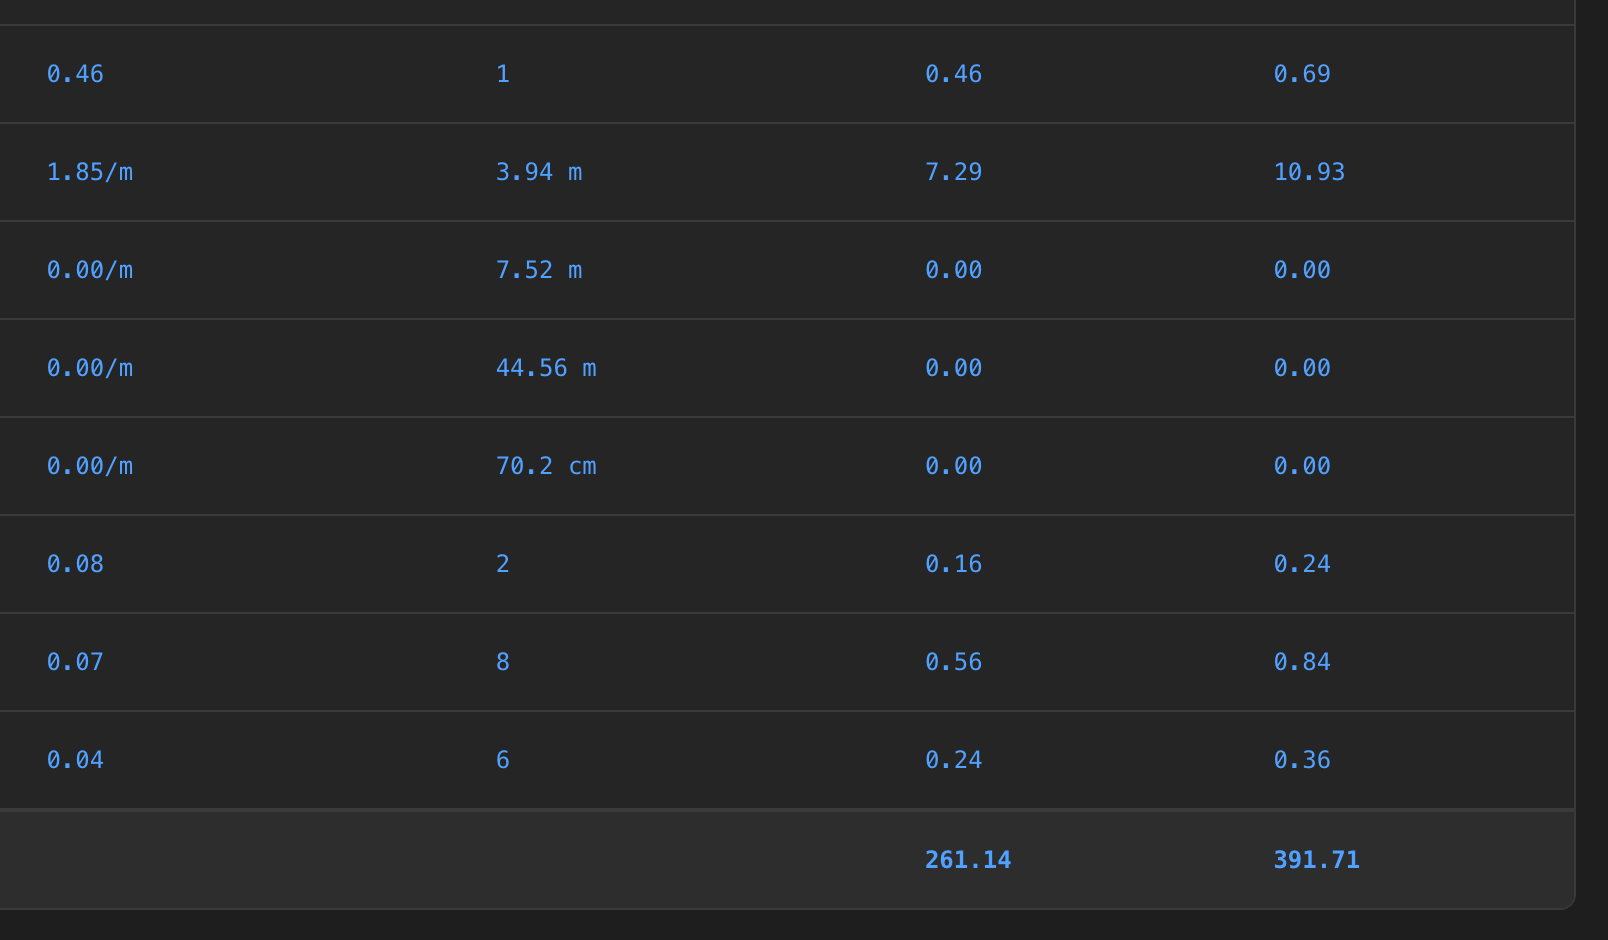
Set it to 1.0 when you want raw material cost — for internal costing or for comparing supplier quotes — and to your real markup when the document is going to a customer.
Marker length
How long one colour code band is. It defaults to 4 mm, or 0.75 inches in imperial units, and it is the only thing that converts a count of markers into a quantity of heat shrink in the BOM.
Set it to whatever your process actually cuts. See Wire colours and marking.
Name and workspace
The same dialog holds the project's Name and its Workspace — the personal or organisation workspace that owns it. See Sheets and workspaces.
Changing the workspace needs a connection; the control is disabled offline in the desktop app.
Deleting a project
Delete at the foot of the dialog removes the project and everything in it: every sheet, every component, all the wiring and all the pin configuration. It asks for confirmation first.
Deleting a project cannot be undone. Library parts survive it — they belong to the workspace, not the project — but nothing else does.
What each setting touches
| Setting | What it changes |
|---|---|
| Units | How lengths are displayed and entered, in the app and in a PDF export. |
| Cutlist multiplier | Every cut length, and the wire quantities in the BOM. |
| Price multiplier | The BOM's Total column and its grand total. |
| Marker length | The heat shrink quantity reported in the BOM. |
Related chapters
Where this chapter leads next, and what it assumes you have already read.
BOM and cut list
Two outputs derived from the sheet: how quantities, pricing, multipliers and cut lengths are worked out.
Wire colours and marking
Heat shrink colour code bands assigned per cavity, how long each one is, and how the BOM counts them.
Sheets and workspaces
Splitting a harness across sheets, mating connectors between them, and who owns the projects above that.